Inside the Workroom: Update on My Chair Project

Welcome to my workroom/studio!
In January, I wrote a blog about two projects I’ve been working on. The first was organizing my workroom, and the second was reupholstering a chair. Both are coming along nicely, and today I'm sharing a progress report on the chair. Upholstery is undoubtedly an interesting learning experience! Take a look at my progress…
A Vintage Find
Twenty years ago, I purchased this small chair at a tag sale for $25. I was set to teach a slipcover class to my American Sewing Guild Neighborhood group and needed furniture that would fit in my car. I finished the slipcover, and it served nicely in my children's playroom before taking up residence in my workroom.

This is the chair that is my first re-uhpholstery project. It look pretty much the same as when I bought it twenty years ago. Unfortunately, I cannot find any photos of the slipcover I made for it. You will just have to imagine that it was awesome ;)
Documenting a New Upholstery Project
My interest in upholstery began 5 years ago when I took basic upholstery classes at the Custom Workroom Conference to improve my skills with cornice boards, headboards, and light upholstery.
These classes piqued my interest in full upholstery, and my small $25 chair was the perfect first project. It had served its purpose well, and I had no nostalgic attachment to it, so with tools in hand, I began to remove the fabric. Like most new-to-me projects, I took many photos during the process of stripping down to the frame, and I kept track of the time it took.

Even with the right tools, taking out all of the tacks (every single one) is a tedious and dirty job. Look at the mess on the floor and the bench. If my workroom looks untidy, it’s because it was! Reorganizing a room sometimes looks worse before it gets better.
Surprising Discoveries
Along the way, I discovered a few surprises. Under the fabric and batting, I found a second fabric, and batting, with a different upholstery style. My chair had been recovered, not reupholstered.

To my surprise, I discovered another fabric with channel back tufting. (And more tacks to remove)
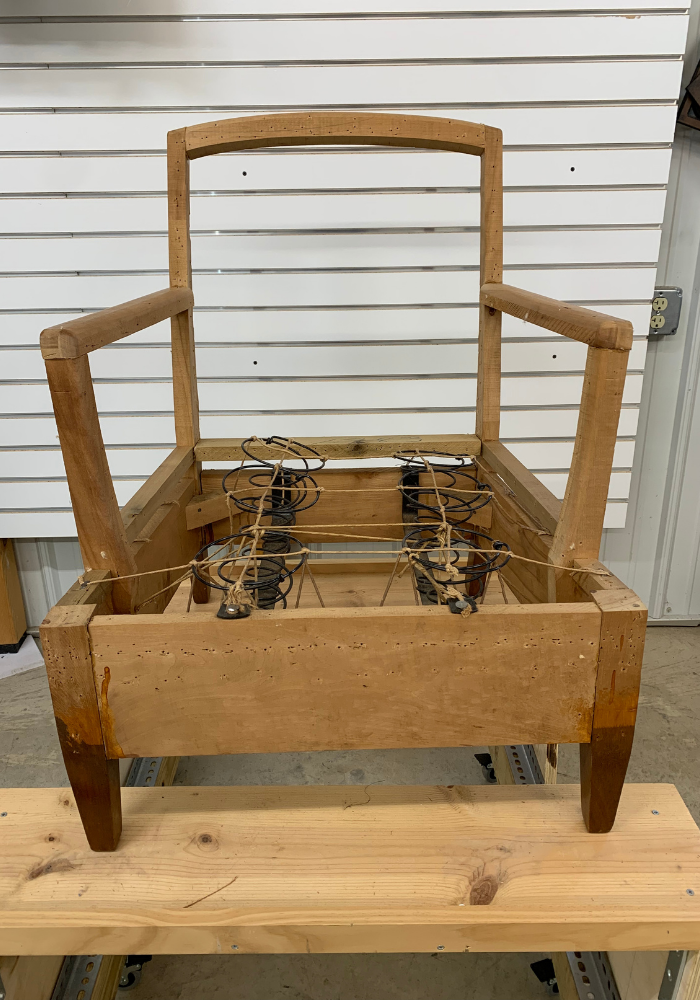
After removing the original fabric and batting, I realized how well-made the frame was because there were no screws, nails, or staples. Instead, either dowel pins or tenon and mortise joins held the frame together. This was a quality piece!

This is a close up of one of the joins. This is a quality built hardwood frame; no staples or plywood here! Does the frame look like a woodpecker has been here? Those are holes from the tacks.
The seat cushion had no zipper and had been hand-sewn closed. In taking it apart, I found my last surprise, Marshall unit springs. These are a set of individual wrapped spring coils covered in and envelope of batting.

I had to pause and answer a few questions with my discoveries.
Did I want to reupholster my chair in the same style as the original channel back or the smooth back style it had when I bought it?
How do I tie the loose spring correctly?
Did I want to re-use the Marshall unit springs, and if I did, how to make a foam casing for them?
I could have guessed my way through this, but I wanted to do it correctly like all of my projects.
Expanding My Upholstery Skills
To finish this chair properly, I needed more information and training. I am now halfway through The Funky Little Chair's online class, Upholstery 200: Fundamentals. Although some of the first few courses were review for me, I've picked up quite a few techniques that will help me be more efficient with cushions and slip seats.
I will continue working on the chair after I have completed the class. When the chair is complete, I know I will have put professional work into it, and it will be a quality piece of furniture I can be proud of. I'm looking forward to sharing the rest of the process with you.
I have always enjoyed all kinds of puzzles and figuring them out. I think that's why I love what I do; many times, a client has challenging windows or furniture, and I enjoy coming up with a solution.
Seeing clients' happy faces after I've created something for their dream home or putting new life into a memorable piece of furniture is my biggest reward.
Do you have a custom project in mind for your home? I would love to help! Book a call with me, and let's get to know each other.
Until next time,
Laura